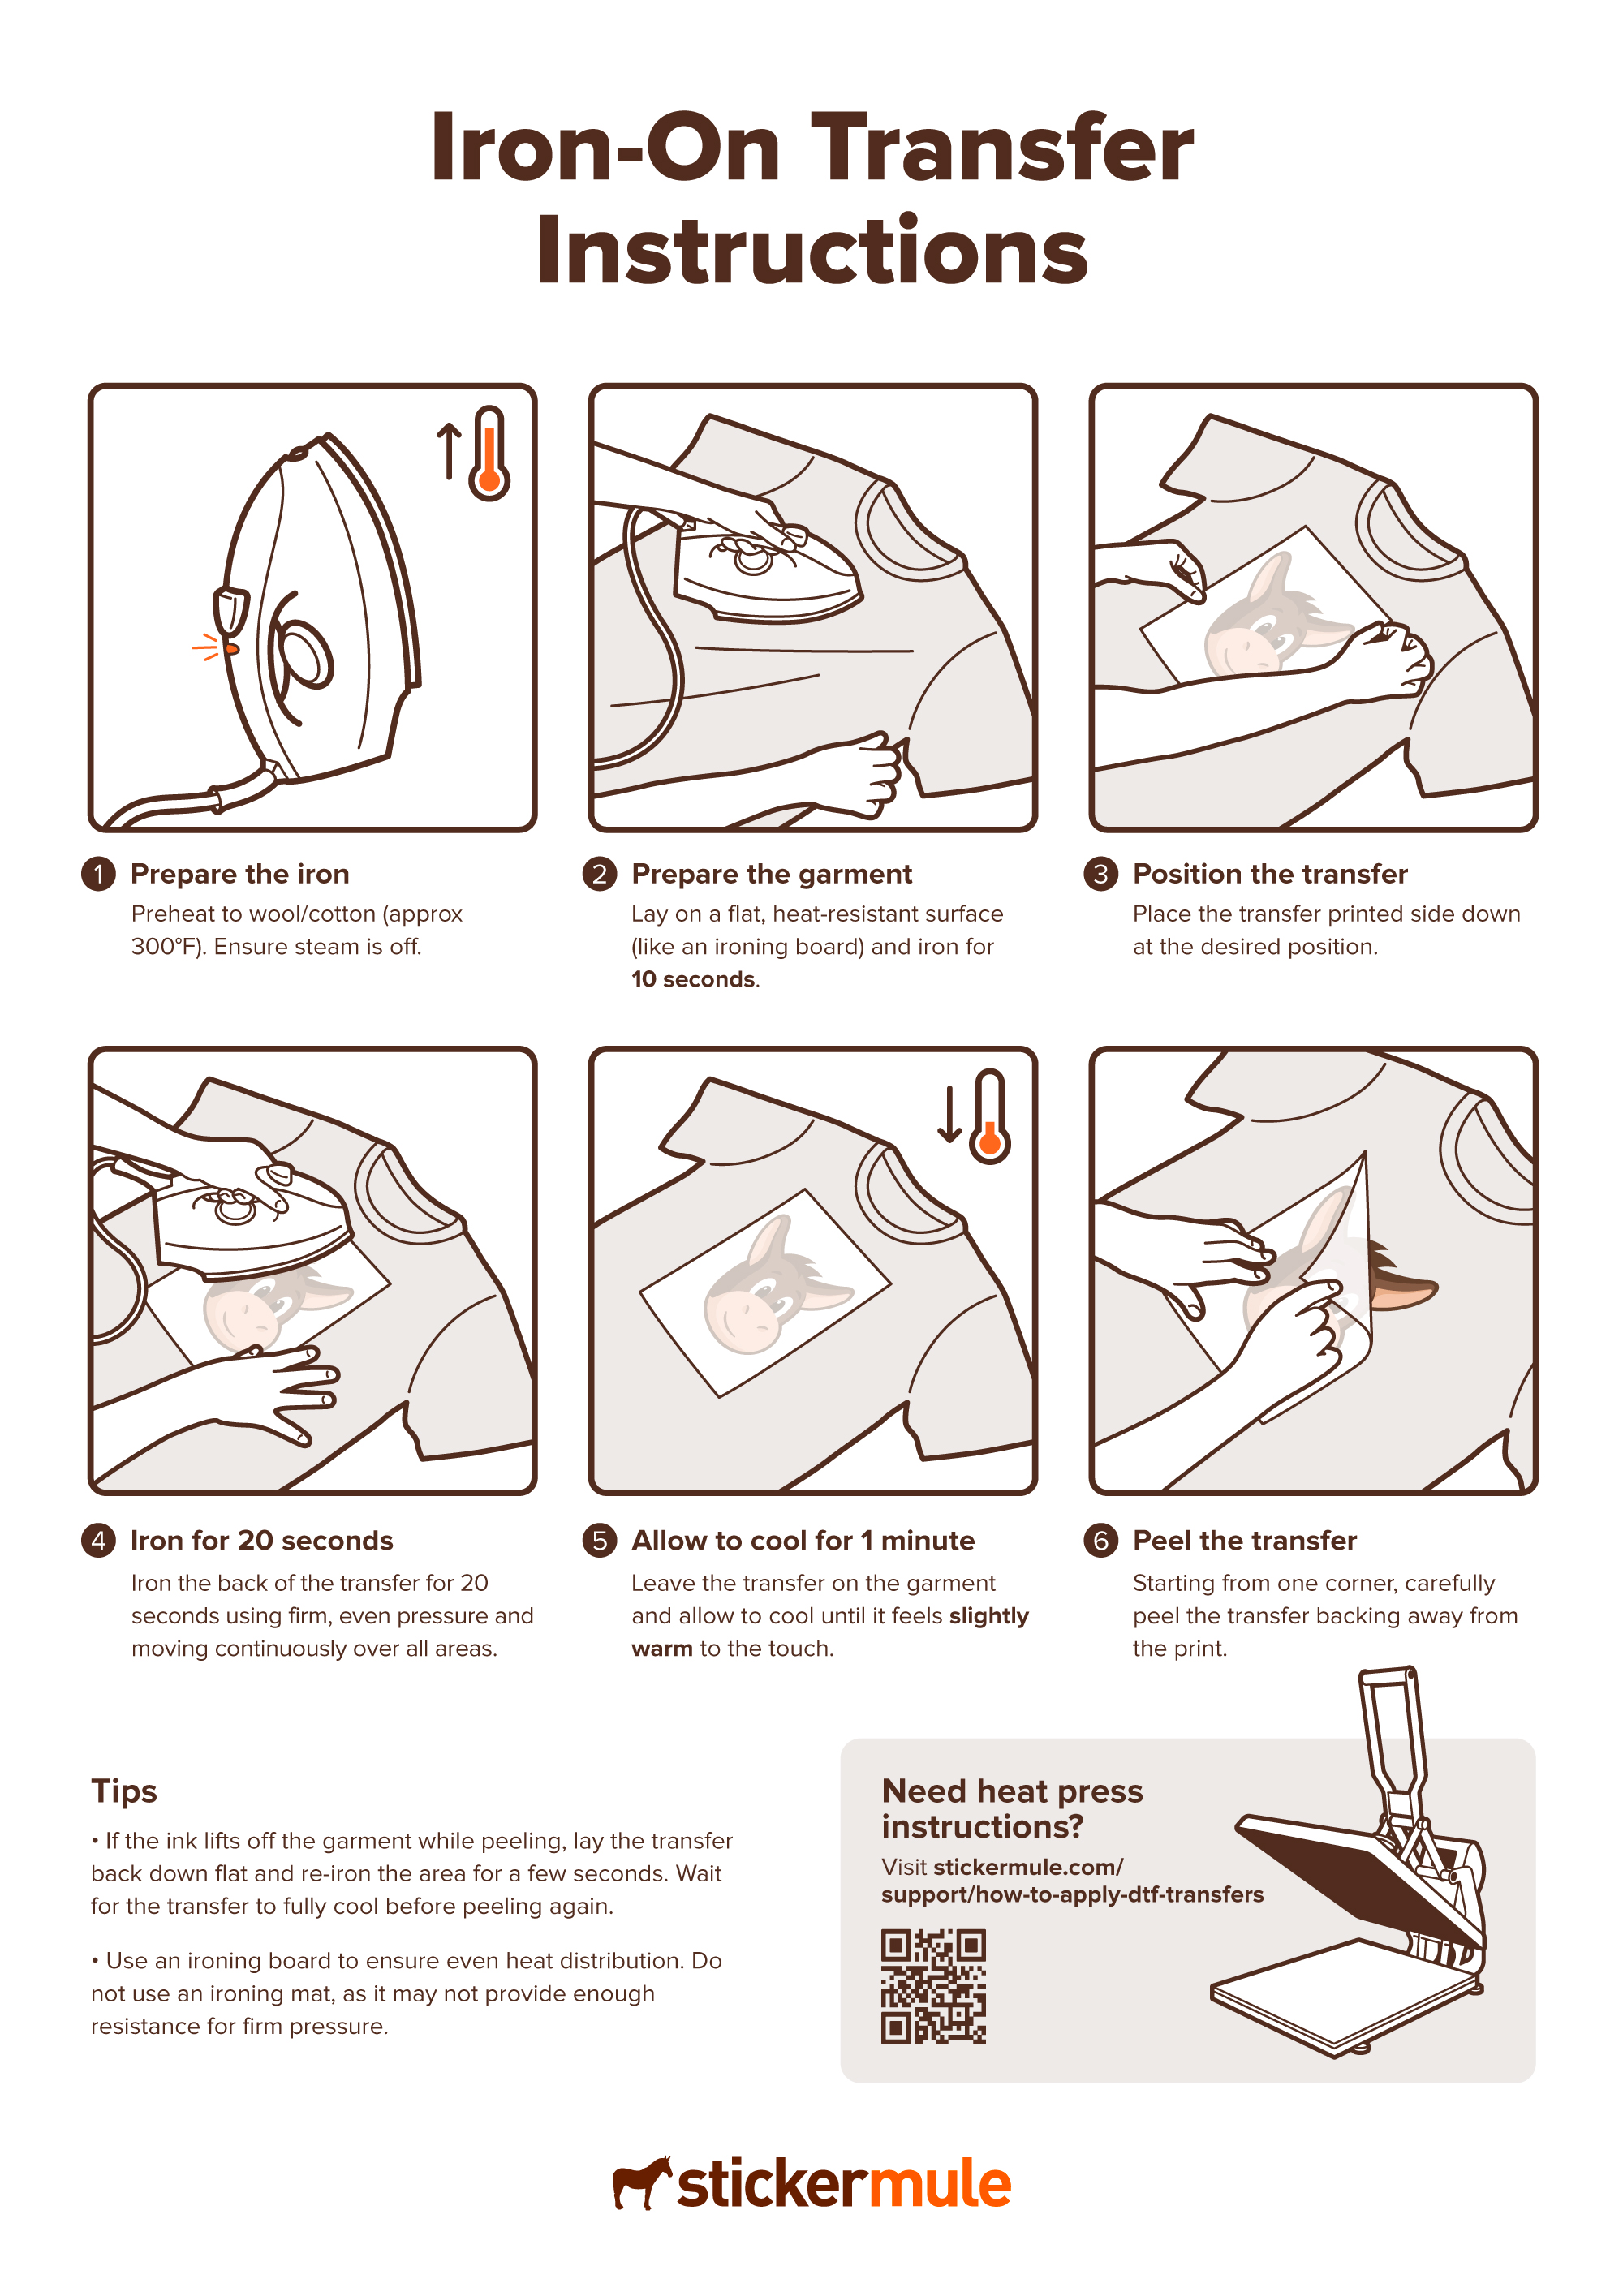
Our DTF transfers are designed for easy application with an iron. We've included a quick how-to video, as well as illustrated instructions below. Here are some helpful things to keep in mind:
- Ensure the iron isn't too hot. We've found that the cotton/wool setting works best. If the iron is too hot, you may get dye migration or burnt materials.
- On the flip side, make sure your iron isn't too cool. Not enough heat will prevent the DTF transfer from adhering well.
- Prep is key! Make sure your garment is clean of any dirt or debris and free of any wrinkles. Heating up the garment with the iron before applying your DTF transfer will make for a smoother application.
- Use consistent pressure with constant movement. Keep moving the iron over your DTF transfer for the full 20 seconds with a smooth, slow, steady motion.
Using a heat press? If you're using a heat press, check out this article for detailed instructions.

Comments