The newbie’s guide to designing stickers in Illustrator
Sticker Mule द्वारा इस को पोस्ट किया गया
When starting out in Adobe Illustrator, basic shapes are your best friend. Learning how to use and manipulate them will allow you to create more detailed illustrations with some practice.
In this tutorial, we’re going to show you how to use Illustrator’s essential tools to create a sticker design. We’ll use simple shapes, applying strokes, and modifying our objects with Live Corners and the Direct Selection Tool.
Step 1: Set up your project
First things first, let’s set up a new document to work in!
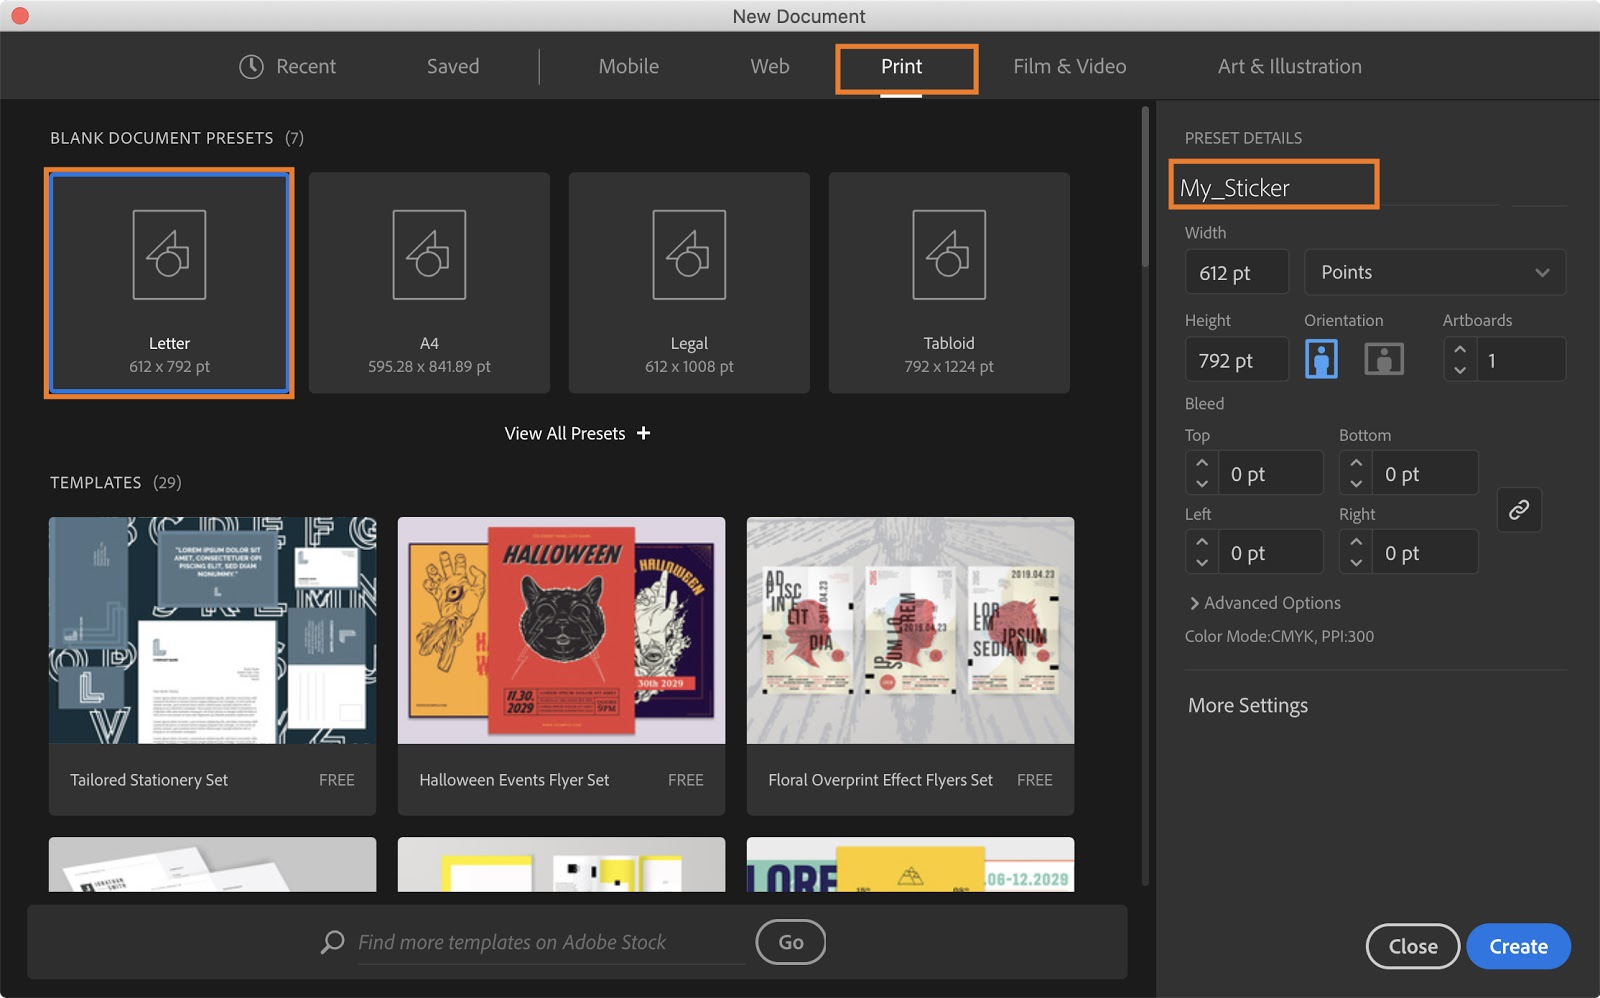
- Open Illustrator and click ‘Create New’.
- Select the ‘Print’ tab and click the ‘Letter’ preset.
- It’s a good practice to get into naming your file at this point too, you do this under ‘preset details’ to the right of the screen.
- Then click on ‘Create’. This will open your document with the correct color profile and resolution for printing already set up for you.
Pro tip: For your reference, when designing for print the correct color profile to use is CMYK and for high-quality print, the resolution of your design should be no less than 300ppi.
Step 2: Use your reference image as a guide
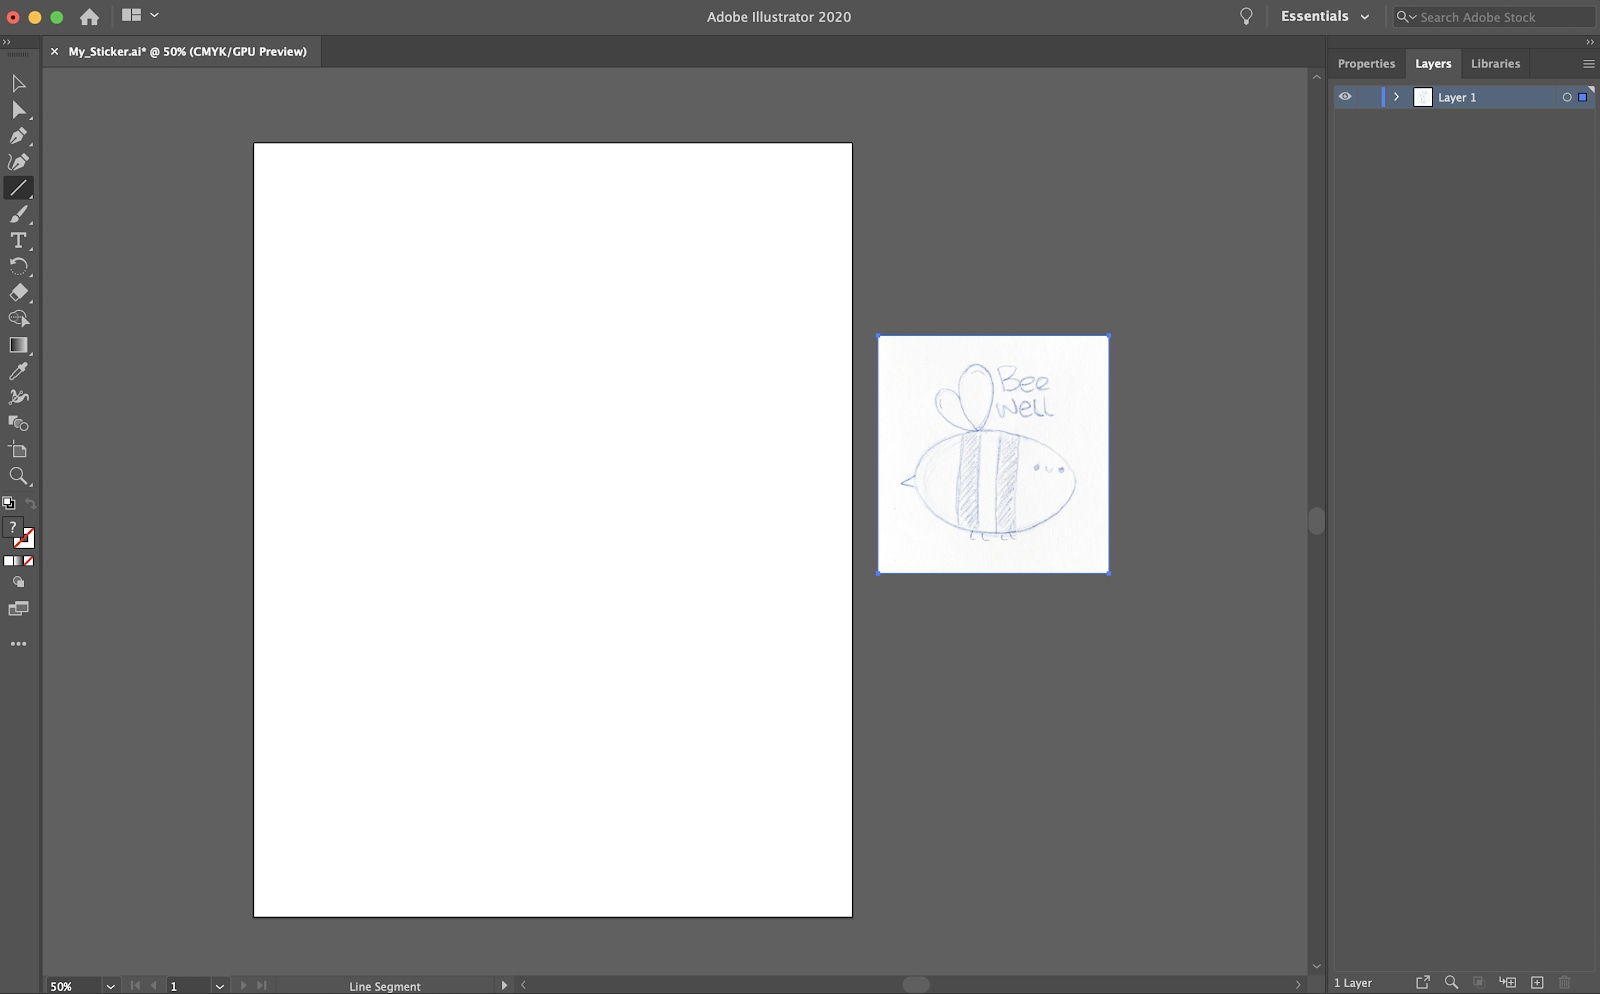
It’s a good idea to start with a reference image. This could either be a sketch you’ve made or a photo of an object you had in mind. This will be your guide throughout the project.
Drag your reference image into your workspace to begin.
Step 3: Use basic shapes to create your design
In the bee-gining there were just shapes. (Sorry, not sorry.)
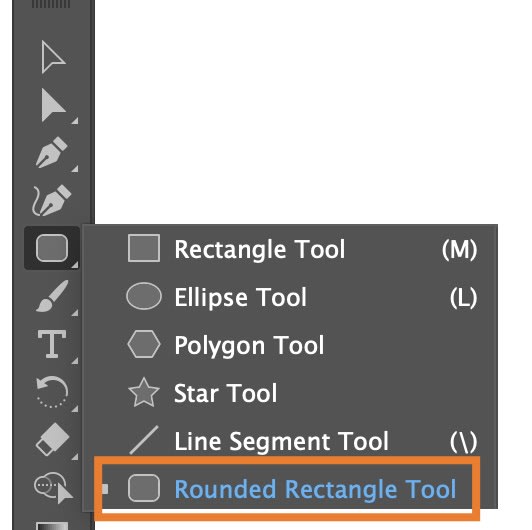
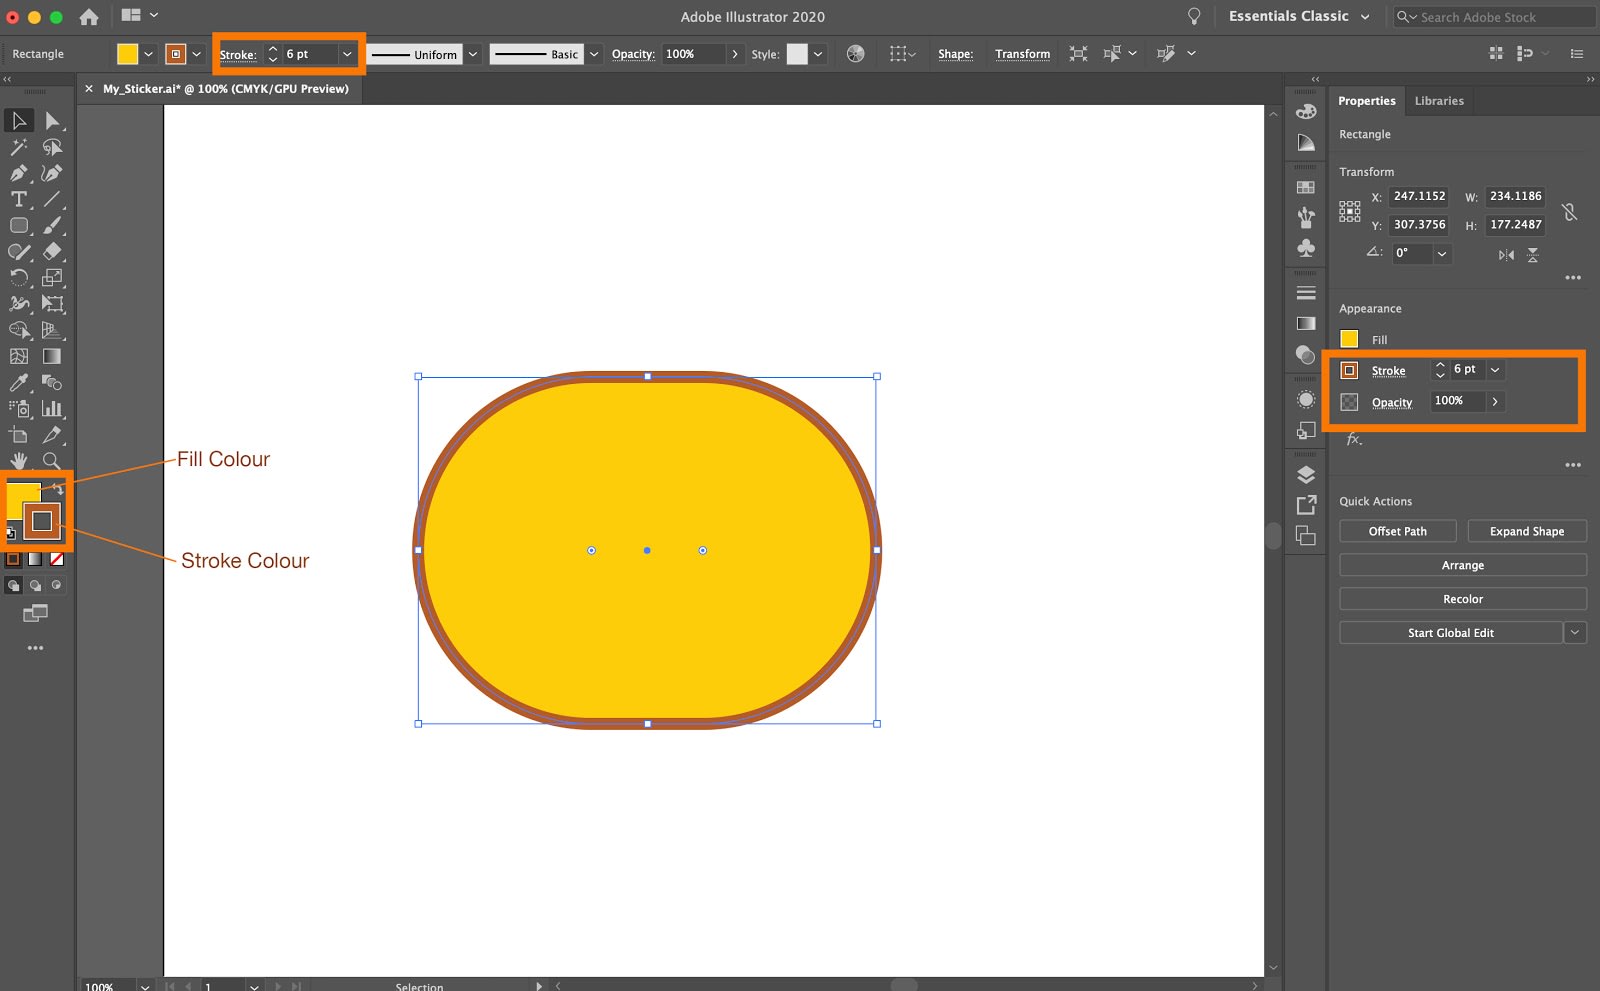
- Select the Rounded Rectangle Tool from the tools panel to make the basic shape of the bee, choose a bright-yellow Fill and brown Stroke.
- Adjust your stroke width to a size you’re happy with, and adjust your corner radius in the properties panel until you’re happy with the shape.
Step 4: Use the Direct Selection Tool
Now for the fun part: adding some stripes to the bee!
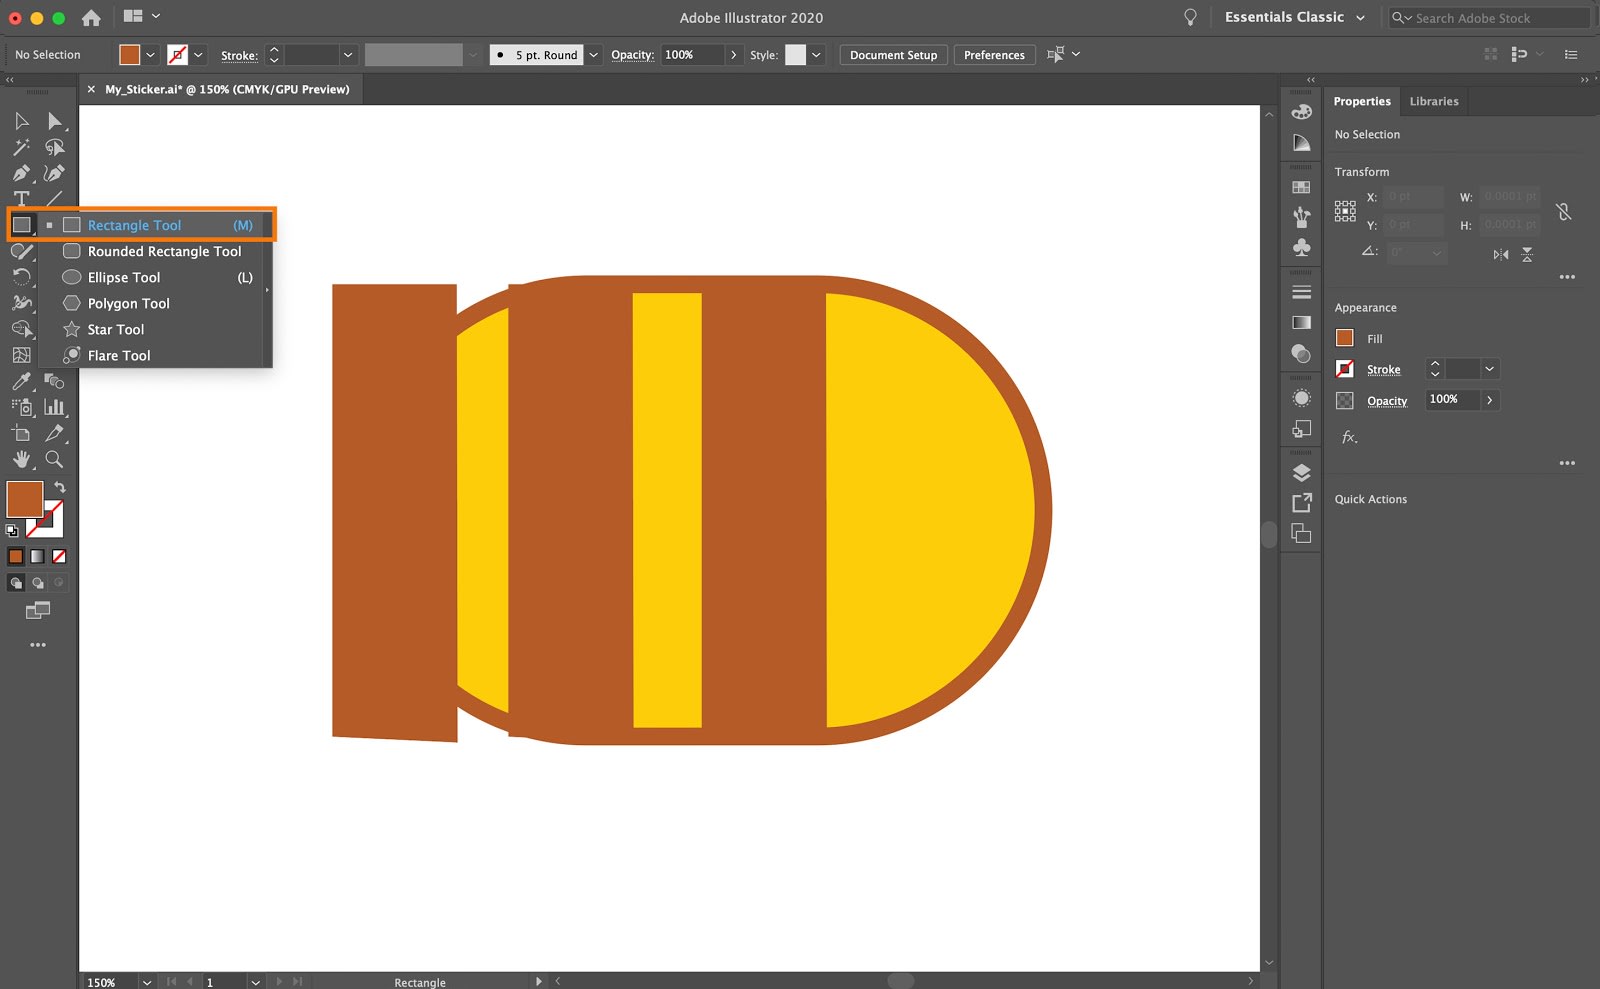
- Use the Rectangle Tool (M), create your first stripe.
- Hold Alt and drag the stripe across to create a copy, repeat this to make a third stripe.
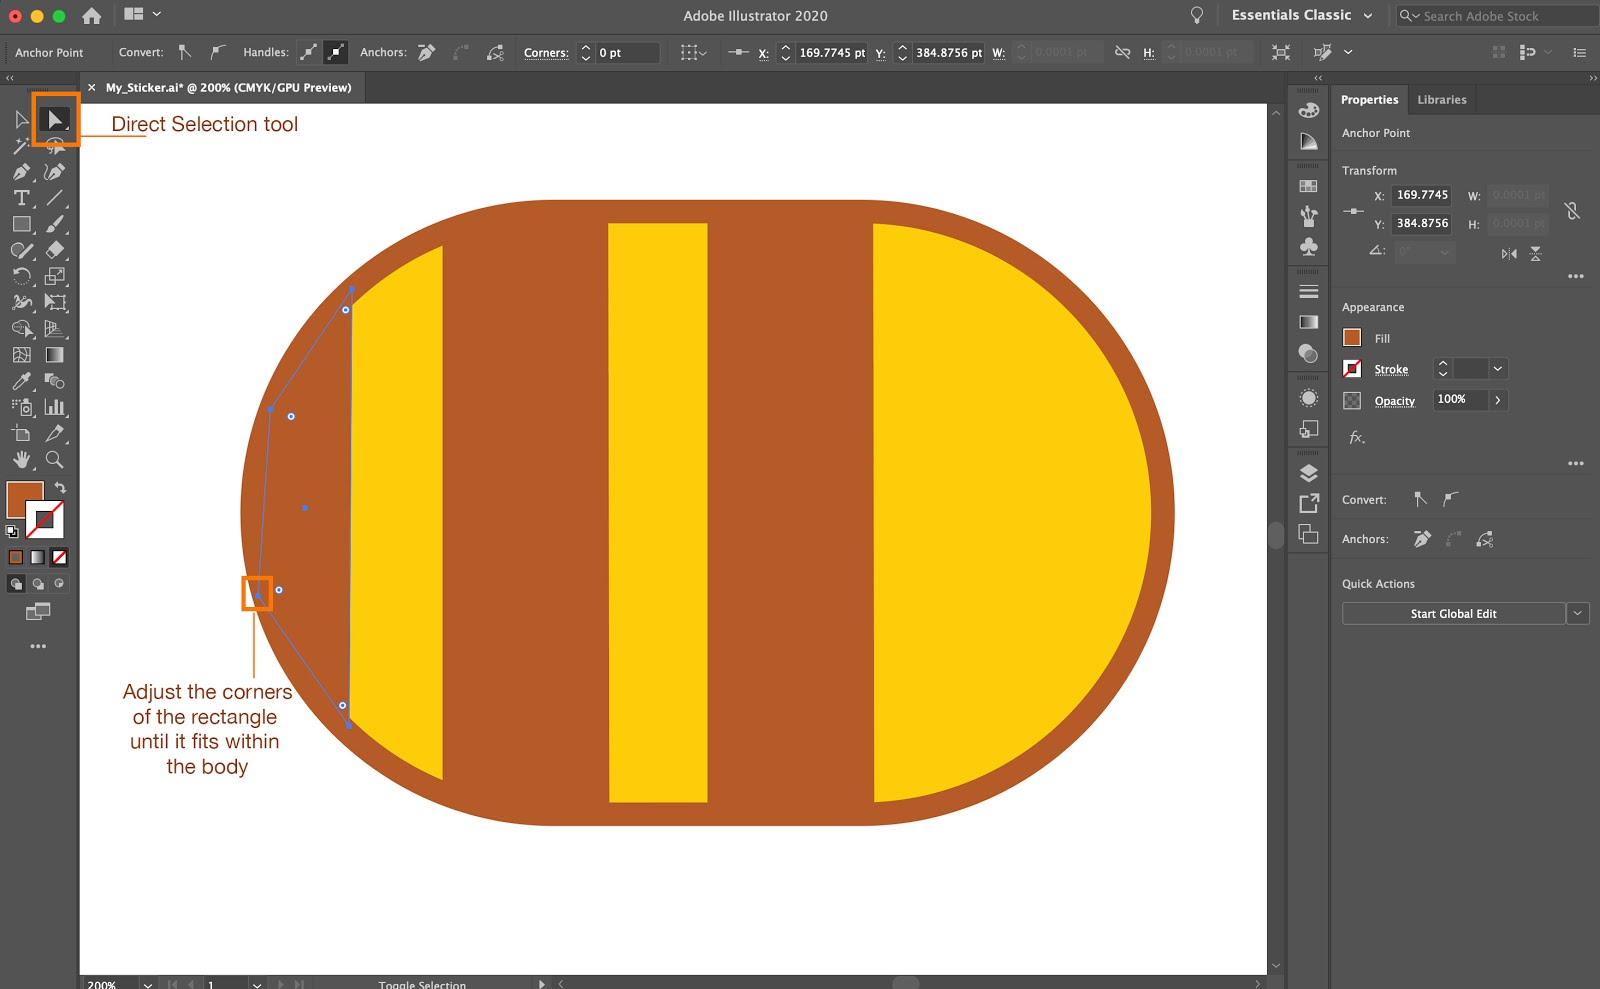
- Our bee’s stripes are looking a bit rogue right now, however, we can make the stripes fit within the body of the bee by using the Direct Selection Tool.
- Select Direct Selection Tool (A) and grab the anchor points on each corner of the rectangle, move them inwards until they fit within the bee’s body.
Step 5: Wing it with some more shapes
Our bee is in desperate need of some wings now.
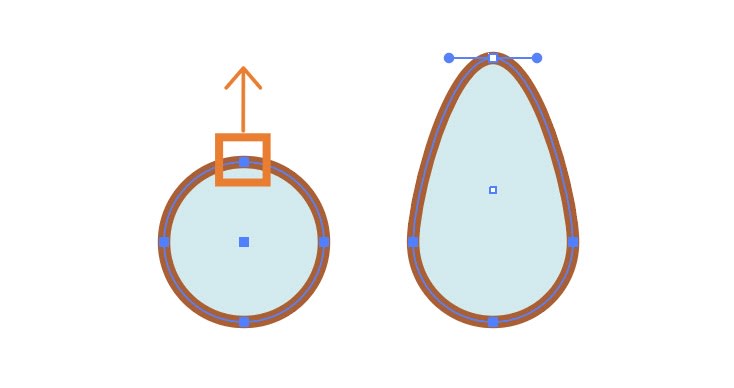
- To make the wings, use the Ellipse Tool (L). If you hold Shift while dragging out your shape, it will create a perfect circle.
- Use a light-blue Fill and the same brown Stroke as the body.
- Select the top anchor point with the Direct Selection Tool (A) and drag it up, making a more wing-like shape.
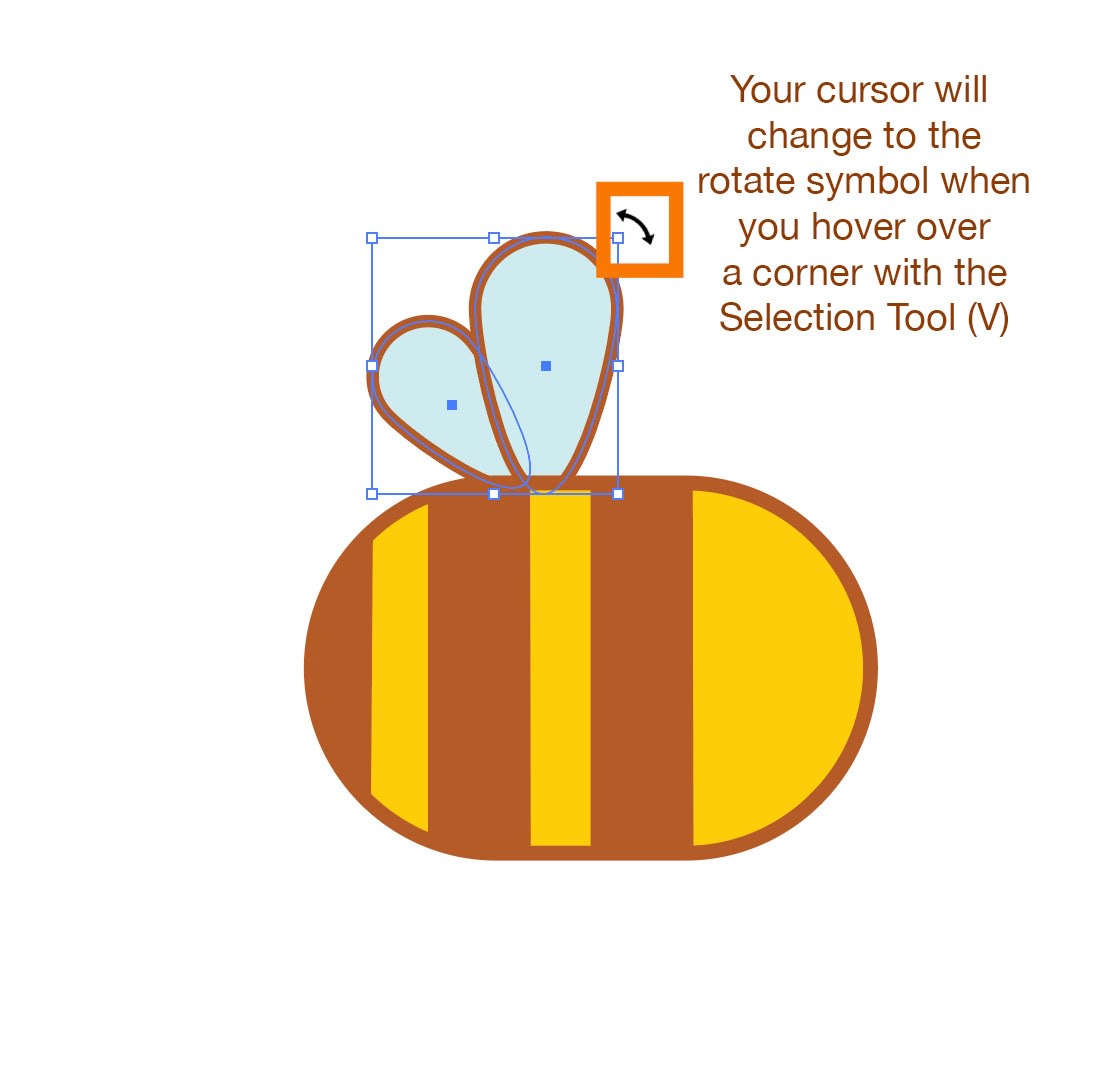
- Rotate the wing by using the Selection Tool (V) and attach the wing to the body of the bee.
- Hold Alt and drag the wing to create a copy for the second wing.
- Let’s scale this second wing down a bit by using the Selection Tool (V). If you hold shift while scaling, it’ll keep the original shape.
- Group the wings by hitting Cmd / Ctrl+G, then let’s move them behind the bee’s body by hitting Cmd / Ctrl + Shift + ]
Step 6: Let’s face it with more shapes and the Arc Tool!
Our bee is now beginning to take shape, but he could really do with a face.
- Let’s make some eyes, again using the Ellipse Tool (L). As before, hold shift as we create the first eye to keep the perfect circle shape. Then let's grab the eye, hold down alt and drag across to create the second eye.
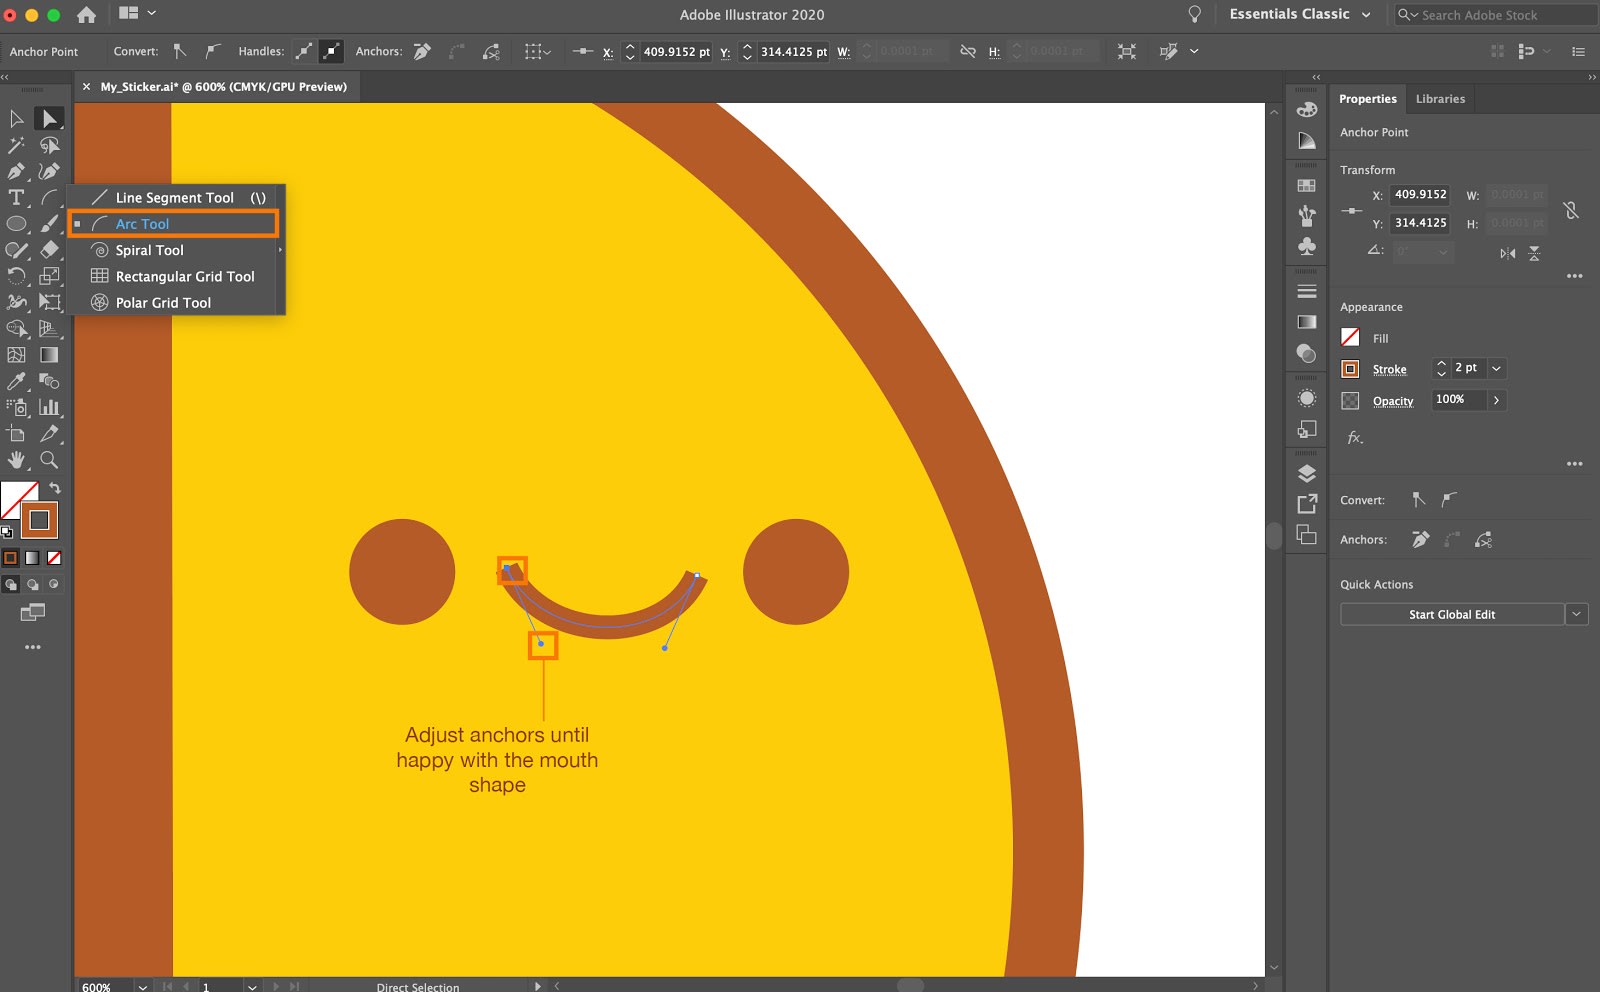
- To create his mouth, we’ll select the Arc Tool. Click and drag out a line, while still holding the left mouse button down, use the down arrow key on your keyboard to slope the line downward.
- You can then use the Direct Selection Tool to adjust the anchors until you’re happy with the mouth shape.
- Use the same method to create some legs. Create your first leg with the arc tool, then click and drag to create copy legs. Hit Cmd / Ctrl+G to group the legs, and send them behind the bee’s body by hitting Cmd/Ctrl + Shift + ]
- To create his littler stinger, use the Rectangle Tool (M) and then the Direct Selection Tool to adjust the anchors to create a point.
Step 7: Time for the finishing touches!
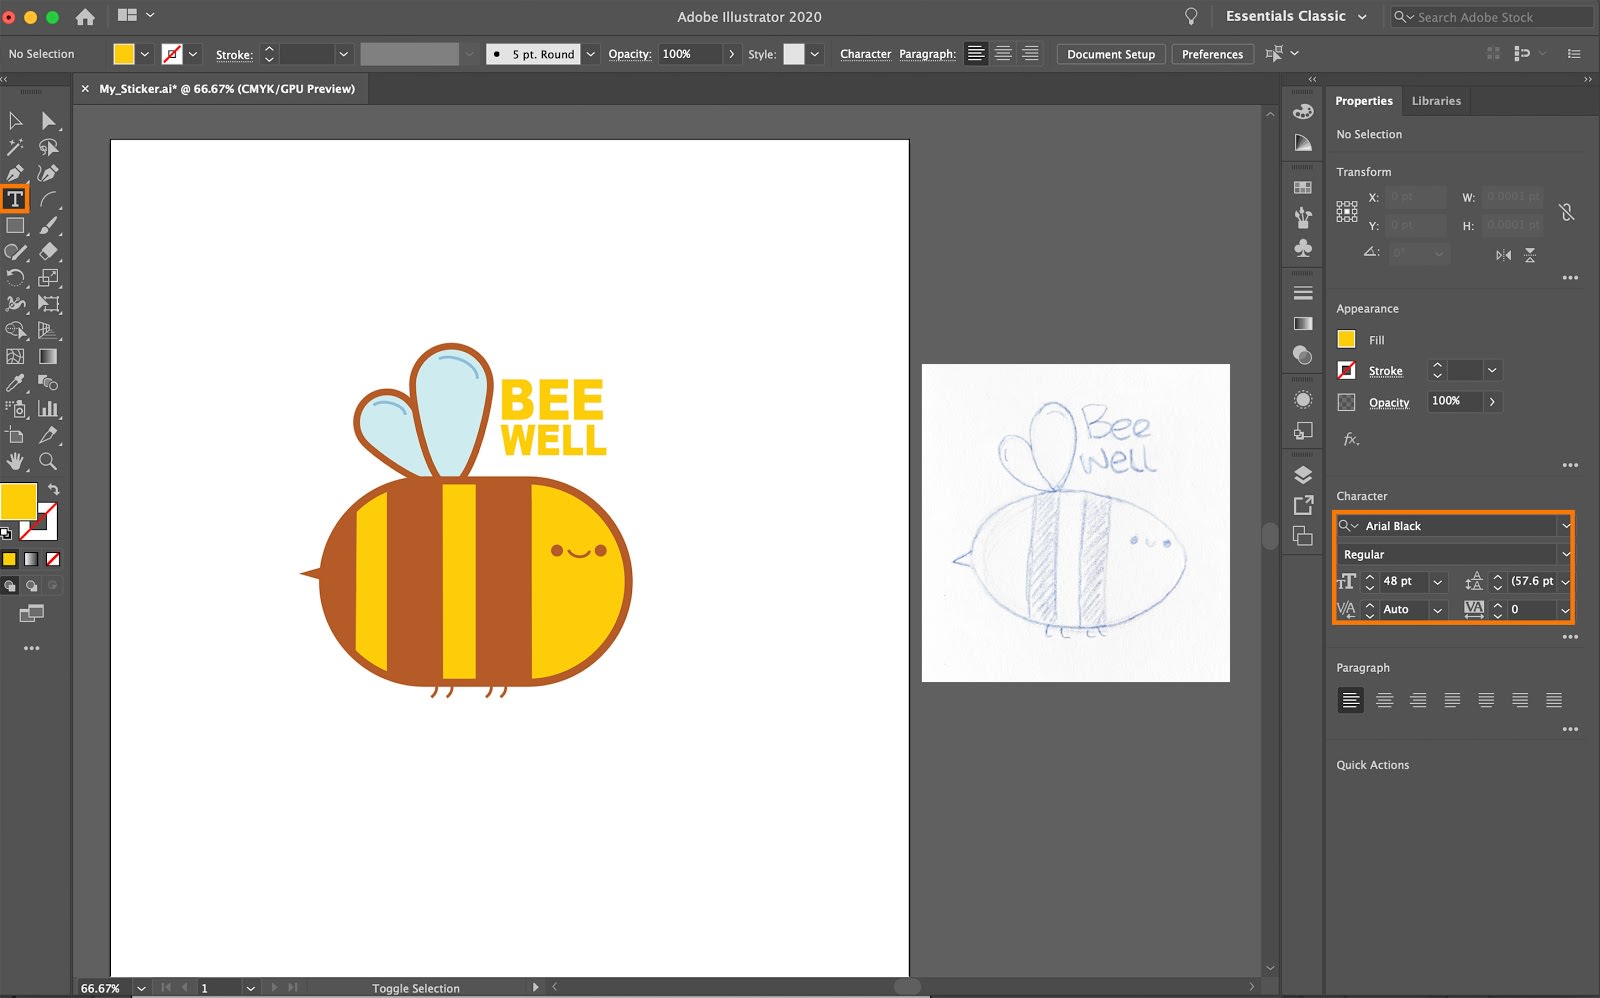
Use the Arc Tool to add some finishing touches to the wings, and if you’re feeling adventurous, add some text by selecting the Text Tool (T). Experiment with different font types and resizing or moving the text around with the Selection Tool until you’re happy.
And that’s it, you’ve made our very own custom sticker design using just basic shapes and a few essential tools in Illustrator!
It takes some time and patience to get a handle on the tools, but keep practicing and creating new sticker designs as often as you can, and you’ll be a pro before you know it.
