How to create a fully editable 3D text effect in Adobe Illustrator
Posted by Sticker Mule on
Remember those times when you wanted to create a 3D text effect in Adobe Illustrator using the good old Blend Tool? This required converting the text to outlines before you could proceed with the actual process of creating the text effect, and it would take a huge chunk of your time to do it.
But what if you wanted to apply it to a different word, try another font, or create multiple variations throughout a project? While it can be fun to create one of them, it will quickly turn into a hair-grabbing task if you have to do this too many times.
Luckily, Adobe Illustrator’s Appearance panel helps you build up your effects from scratch before you can save them forever as a Graphic Style. From there, you can use it over and over again. Magic!
How to create an editable 3d text effect in Adobe Illustrator
Step 1: Open the Appearance panel
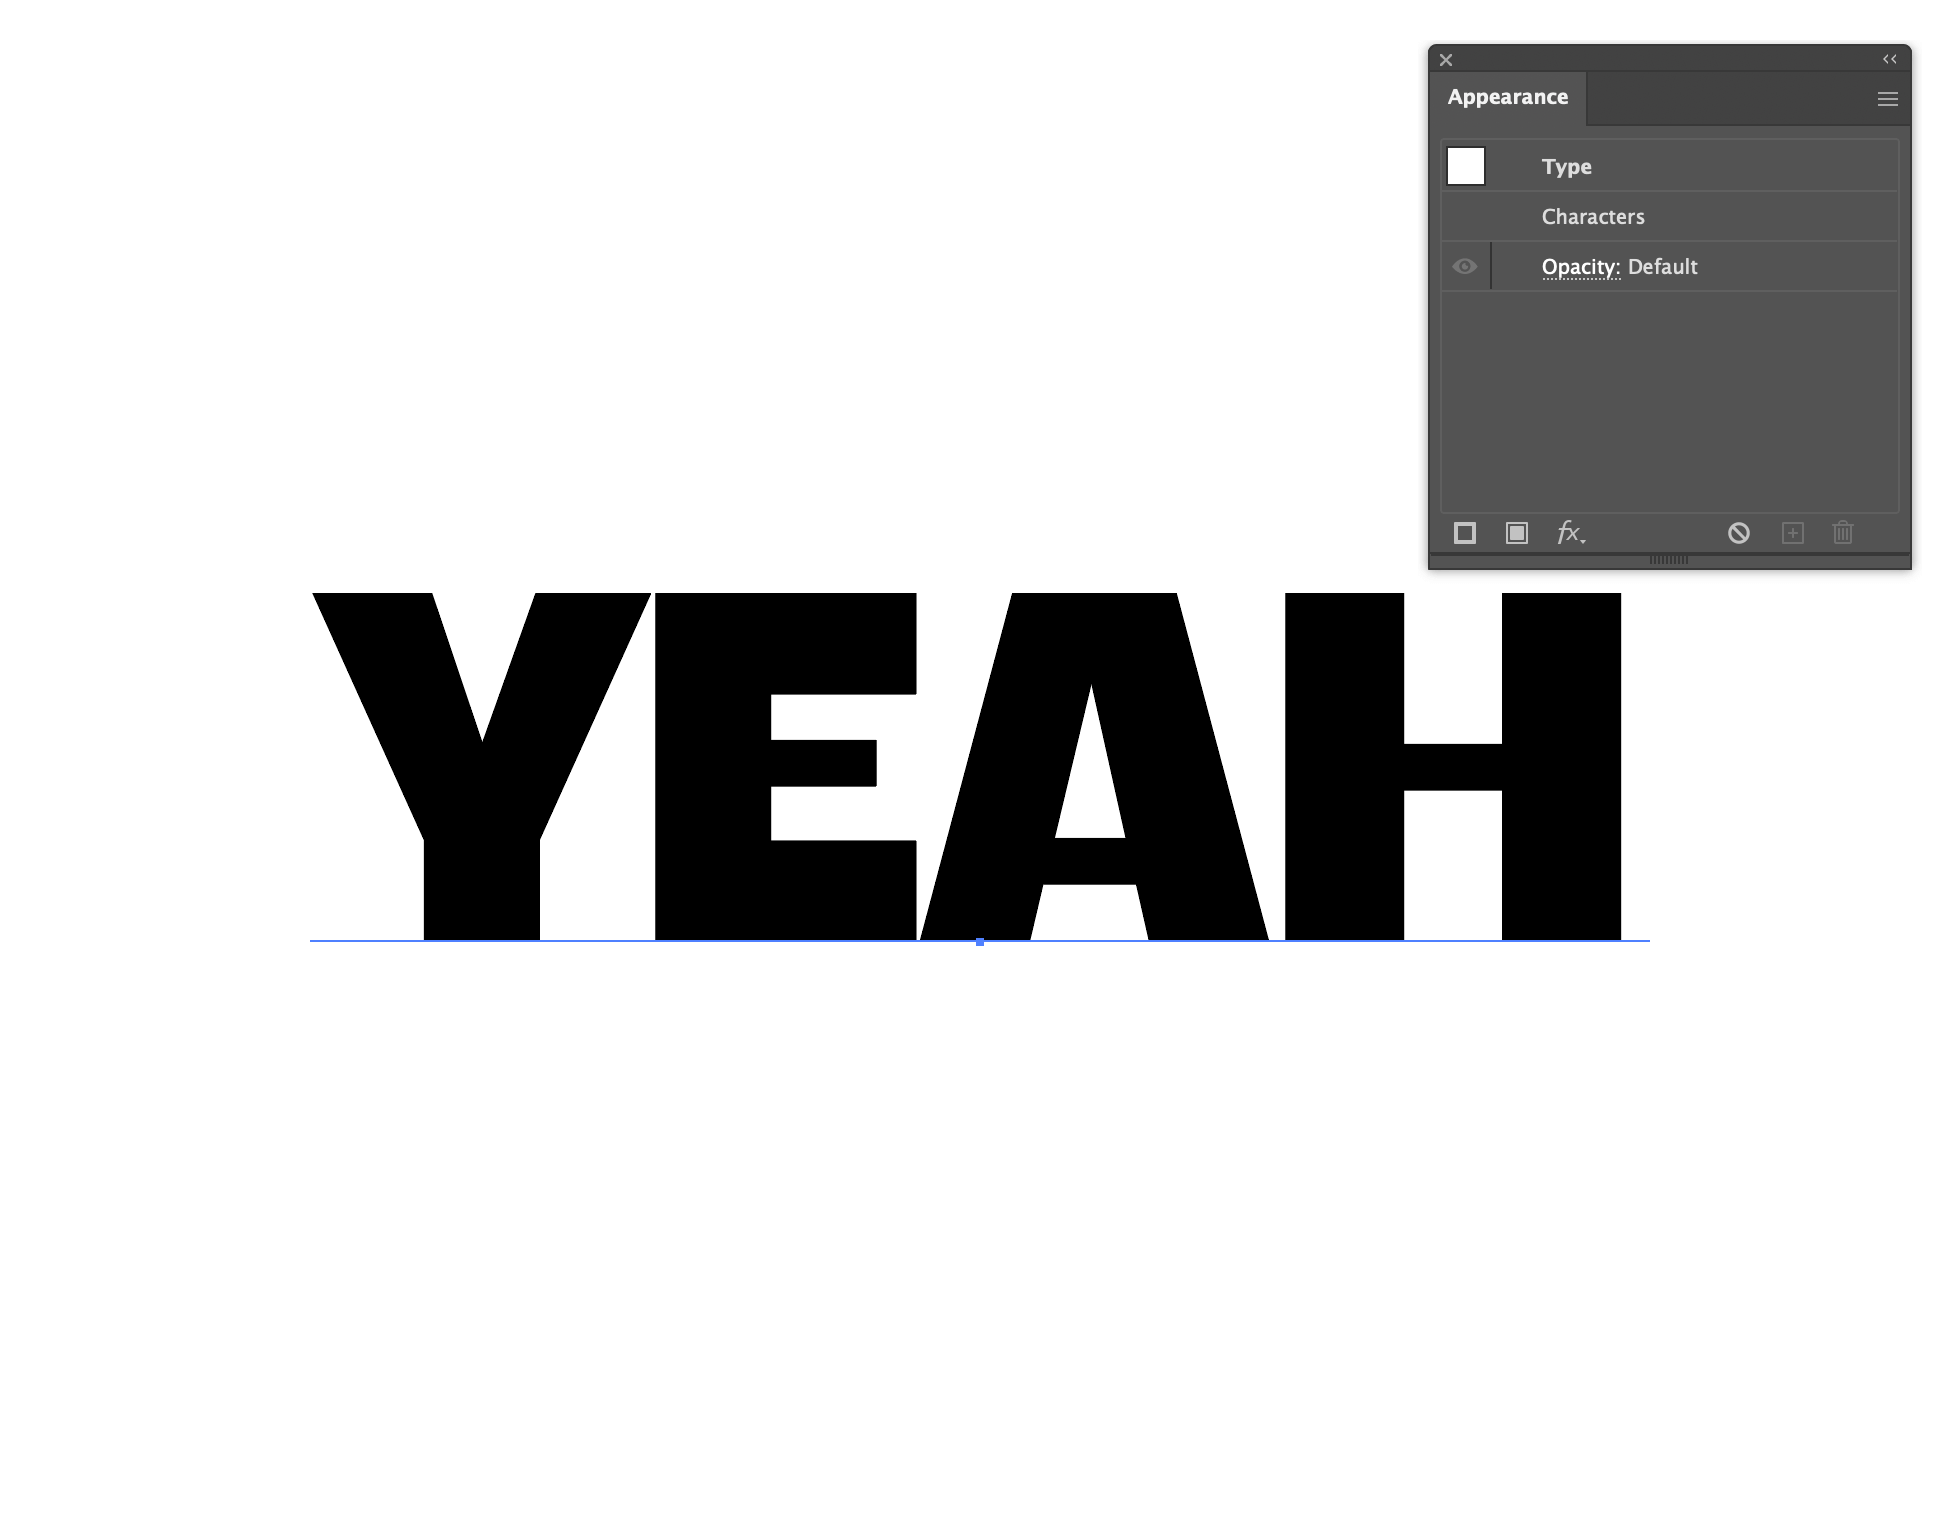
Select your text and go to Window > Appearance to open up the Appearance panel.
Step 2: Add and organize fills
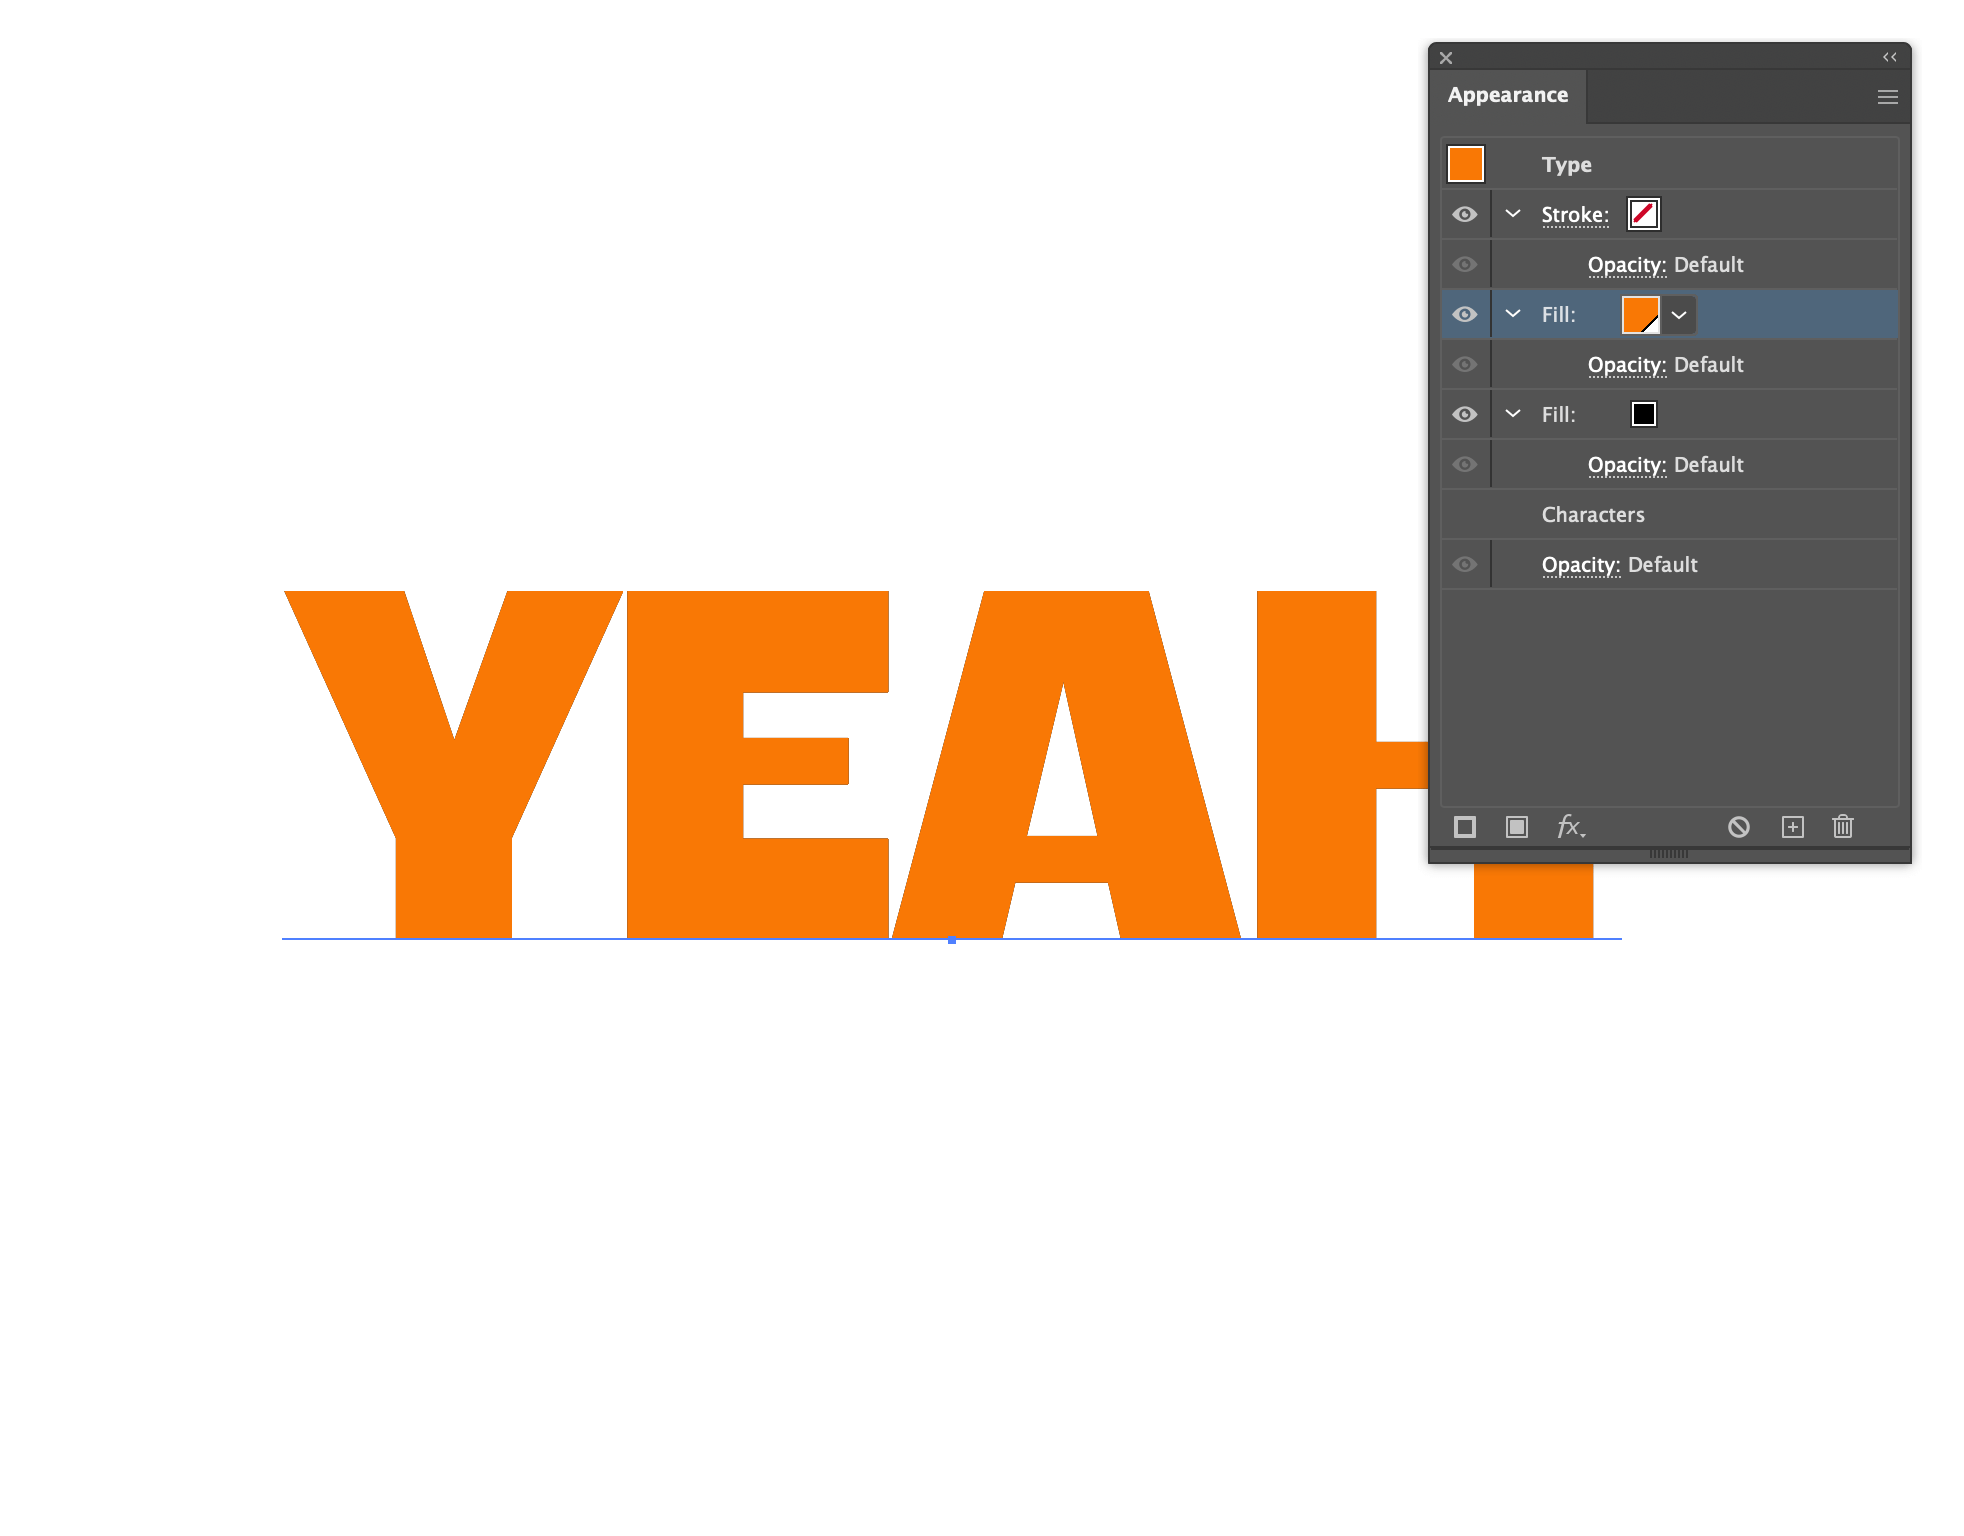
Remove any fill or stroke from the text. Then, at the bottom of the panel, head over to Add New Fill and add 2 separate fills.
The lowest fill viewed in the panel will be the shadow part and the fill above will be your text color.
Tip: Keep enough contrast between both colors to make it really "pop".
Step 3: Apply offset path for depth
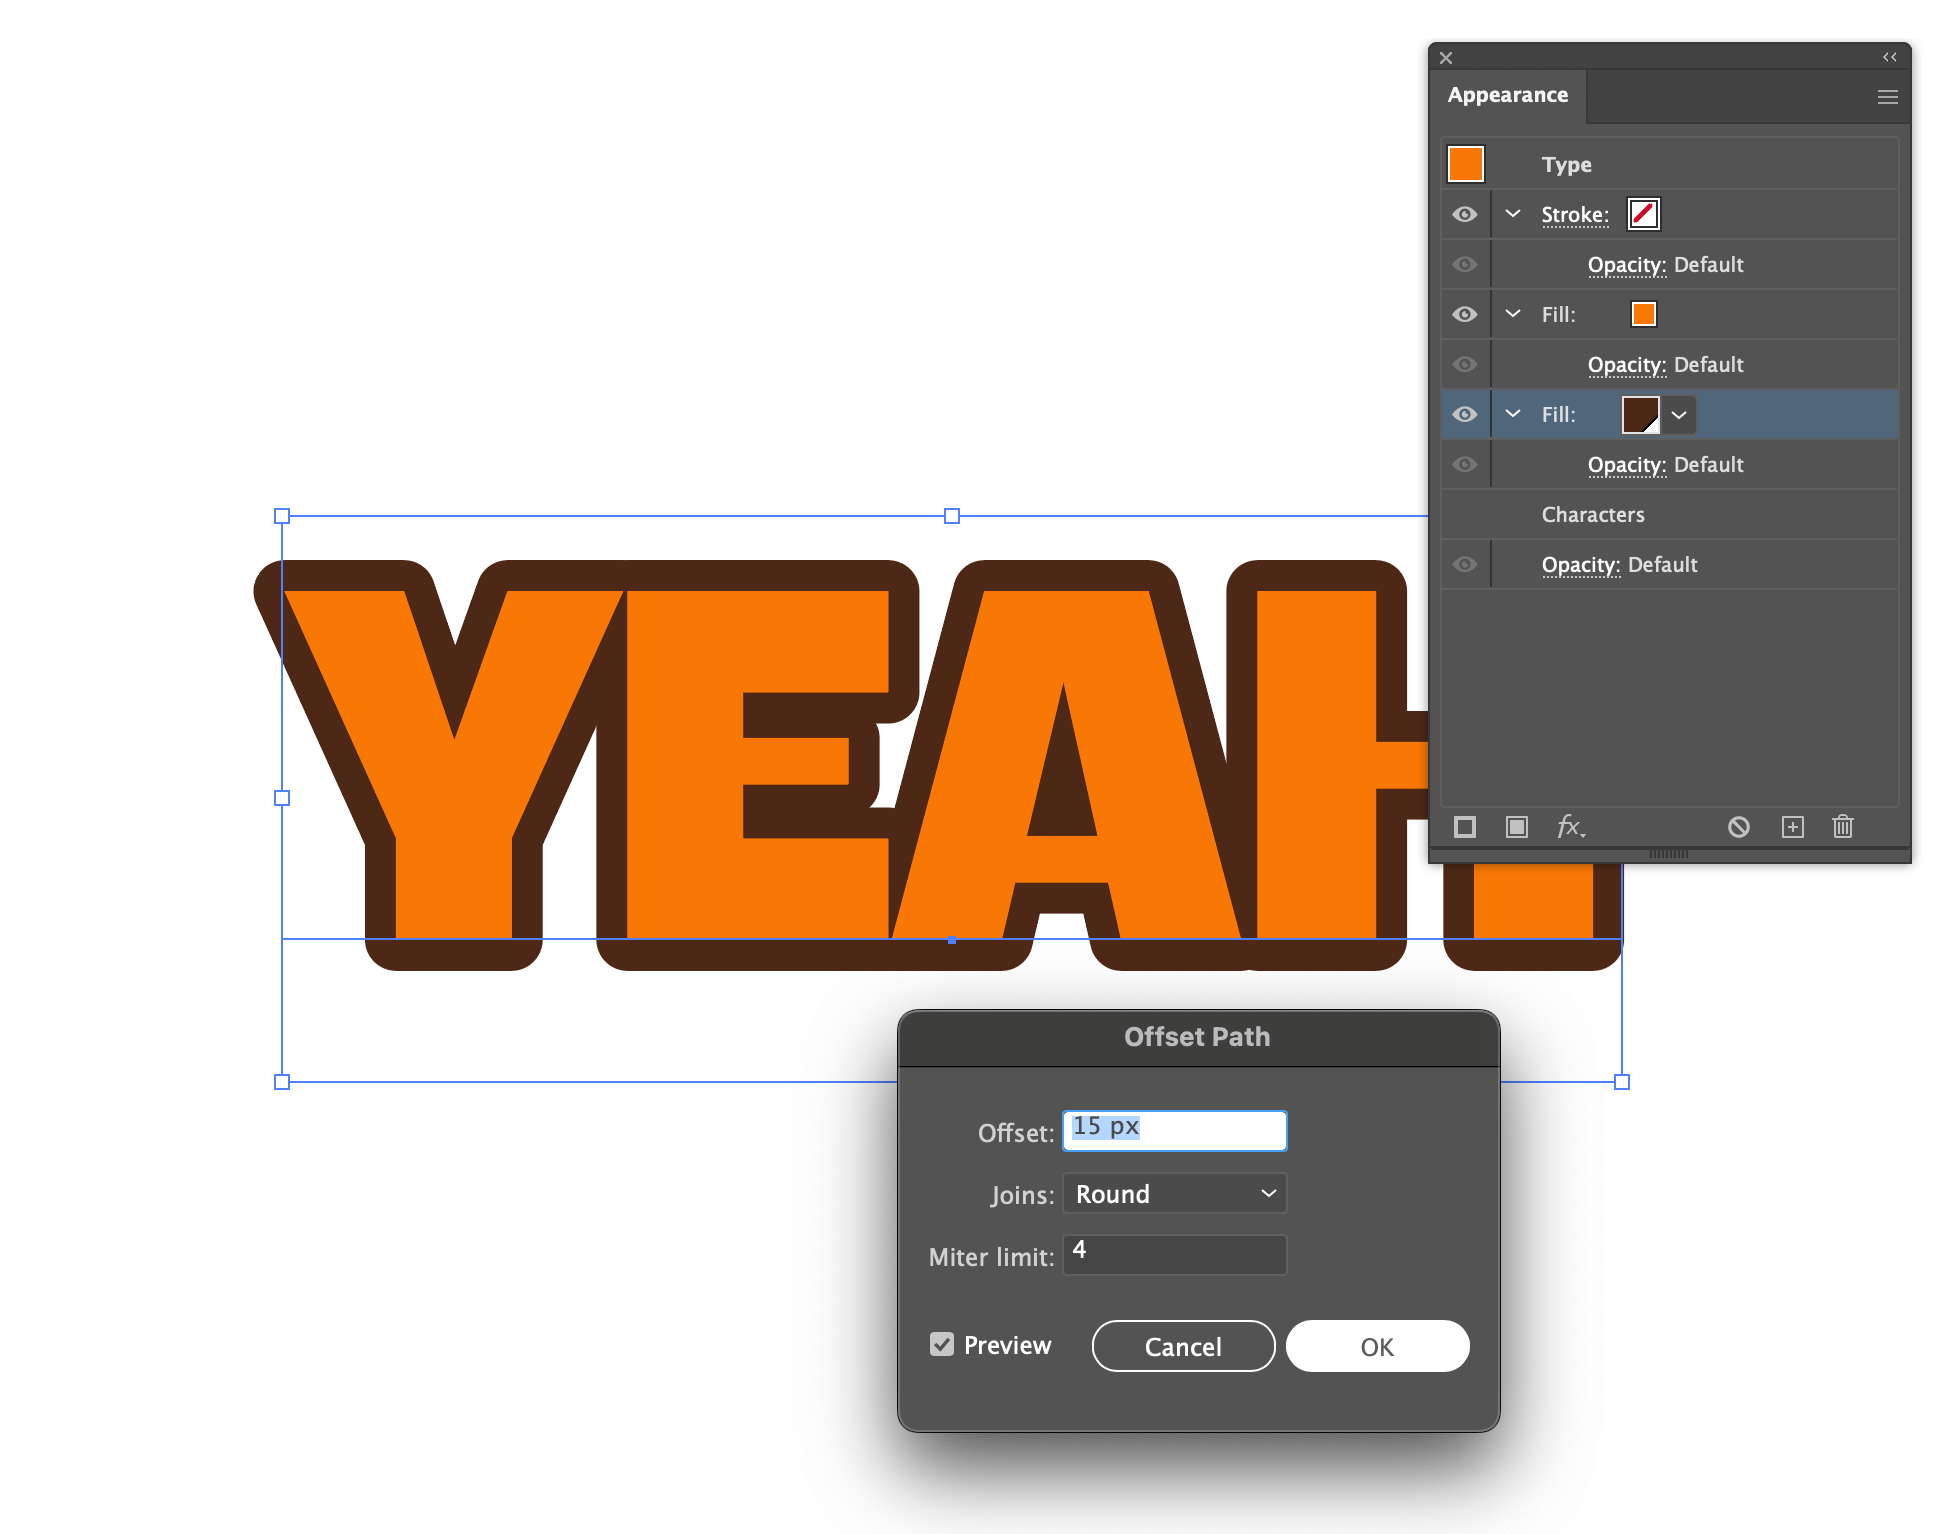
Now go back and select the lower fill, click on the fx icon at the bottom and go to Path > Offset Path. Choose your desired size and set the Joins to Round. Click OK.
Step 4: Transform and duplicate for shadow effect
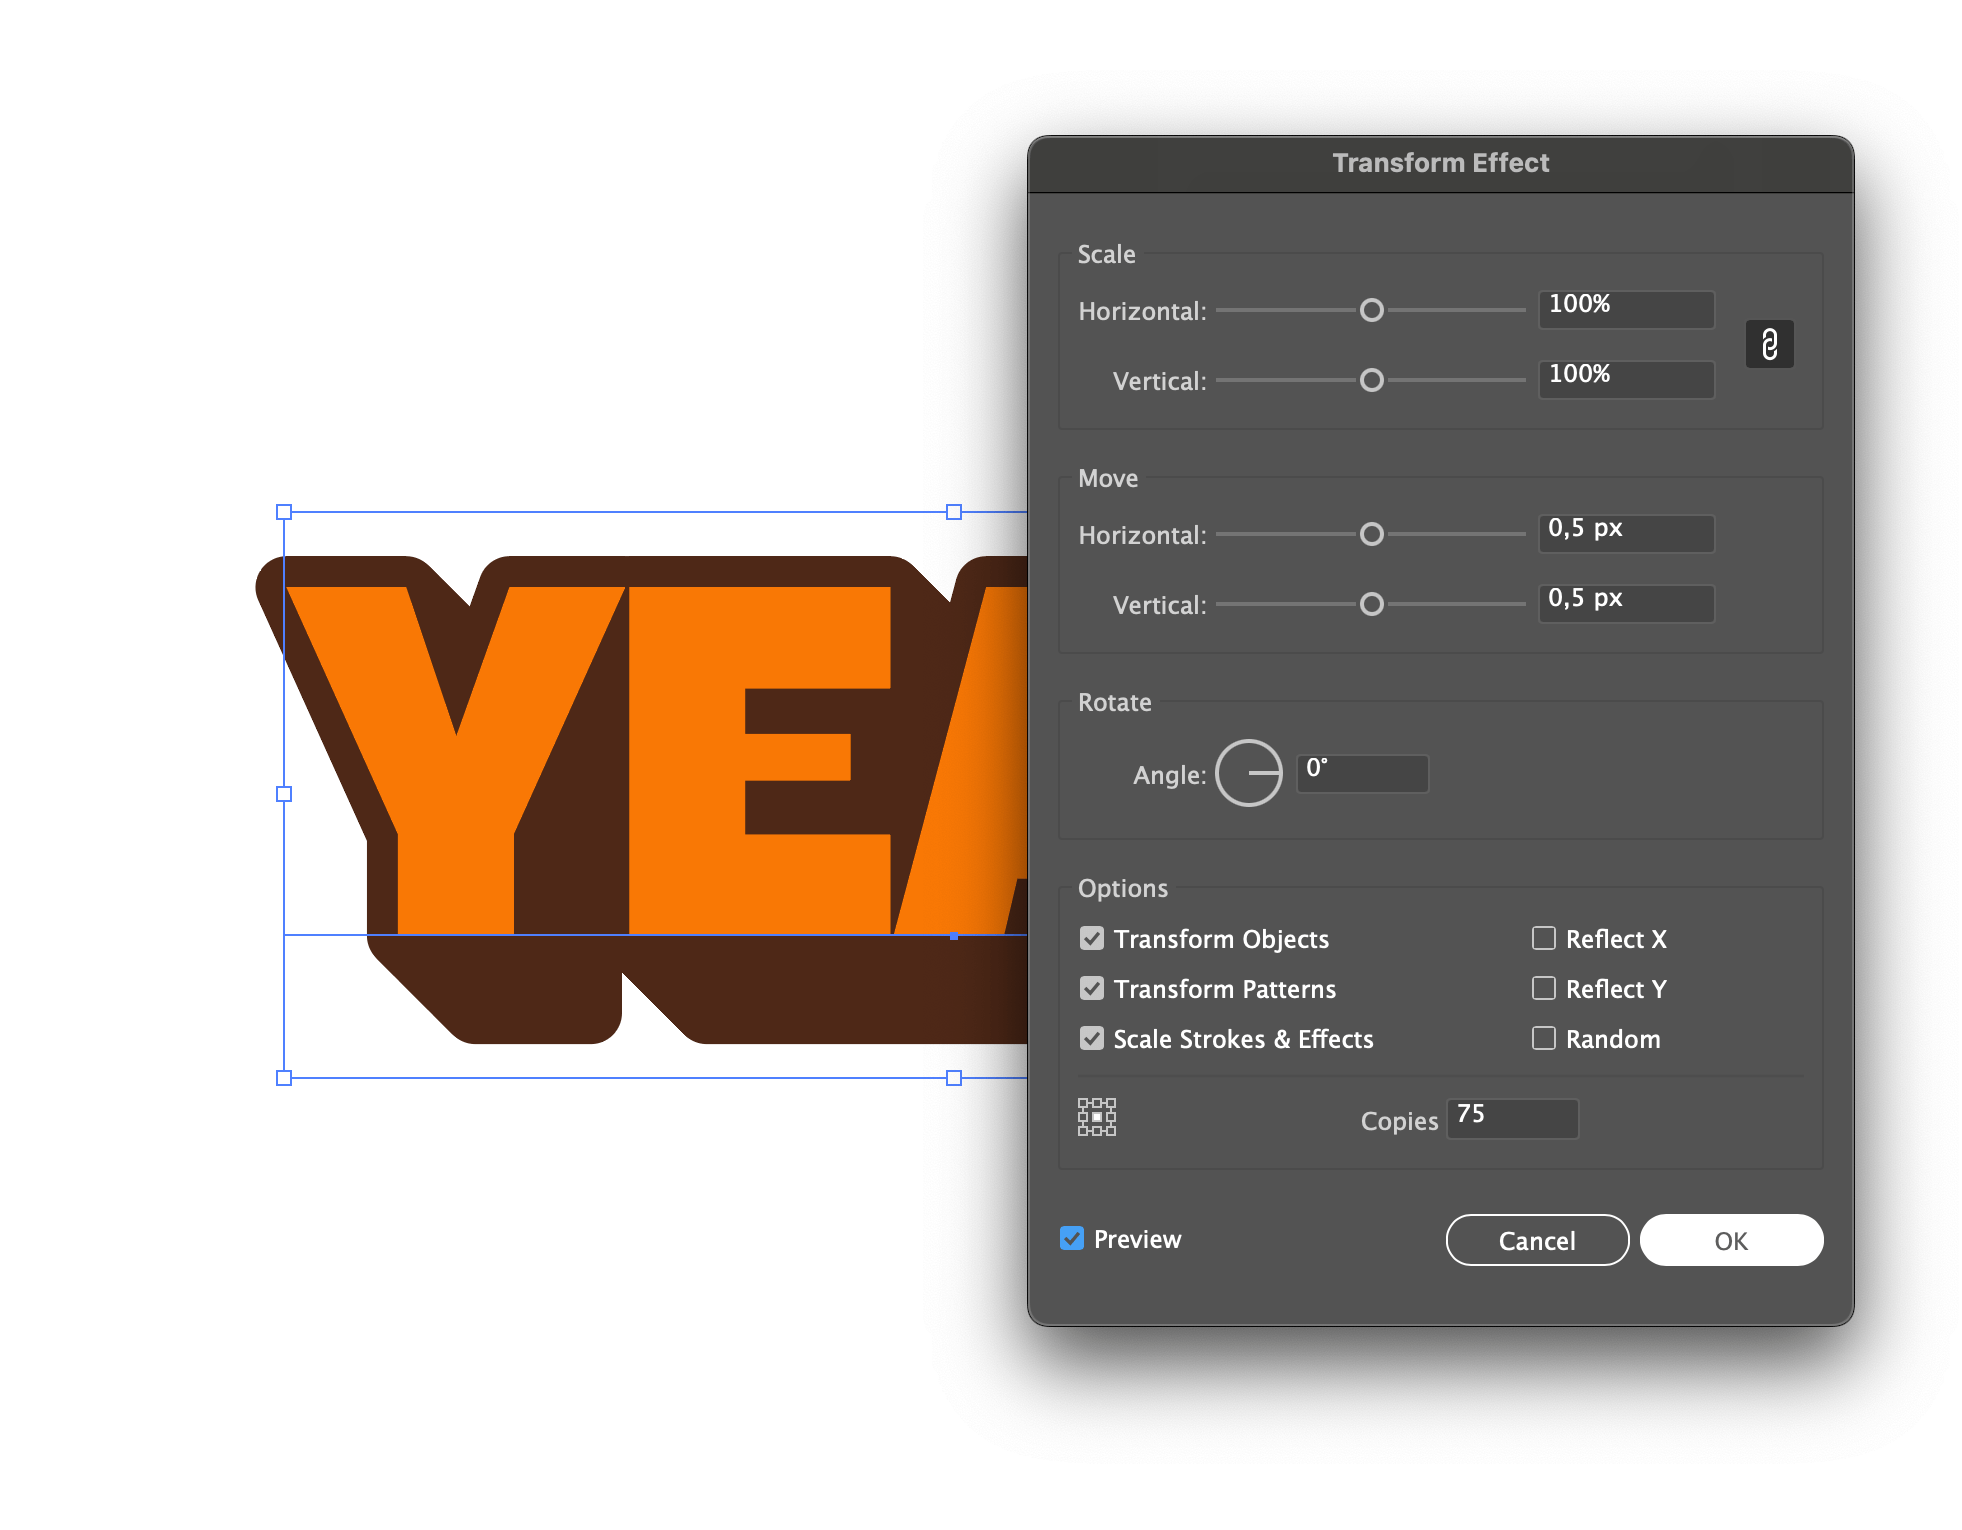
With the same lower fill selected, head over to fx again and go to Distort & Transform > Transform. In the Move section, add 0.5 px to both the horizontal and vertical sides. Then, choose the number of copies you want and hit OK.
Step 5: Save as a graphic style
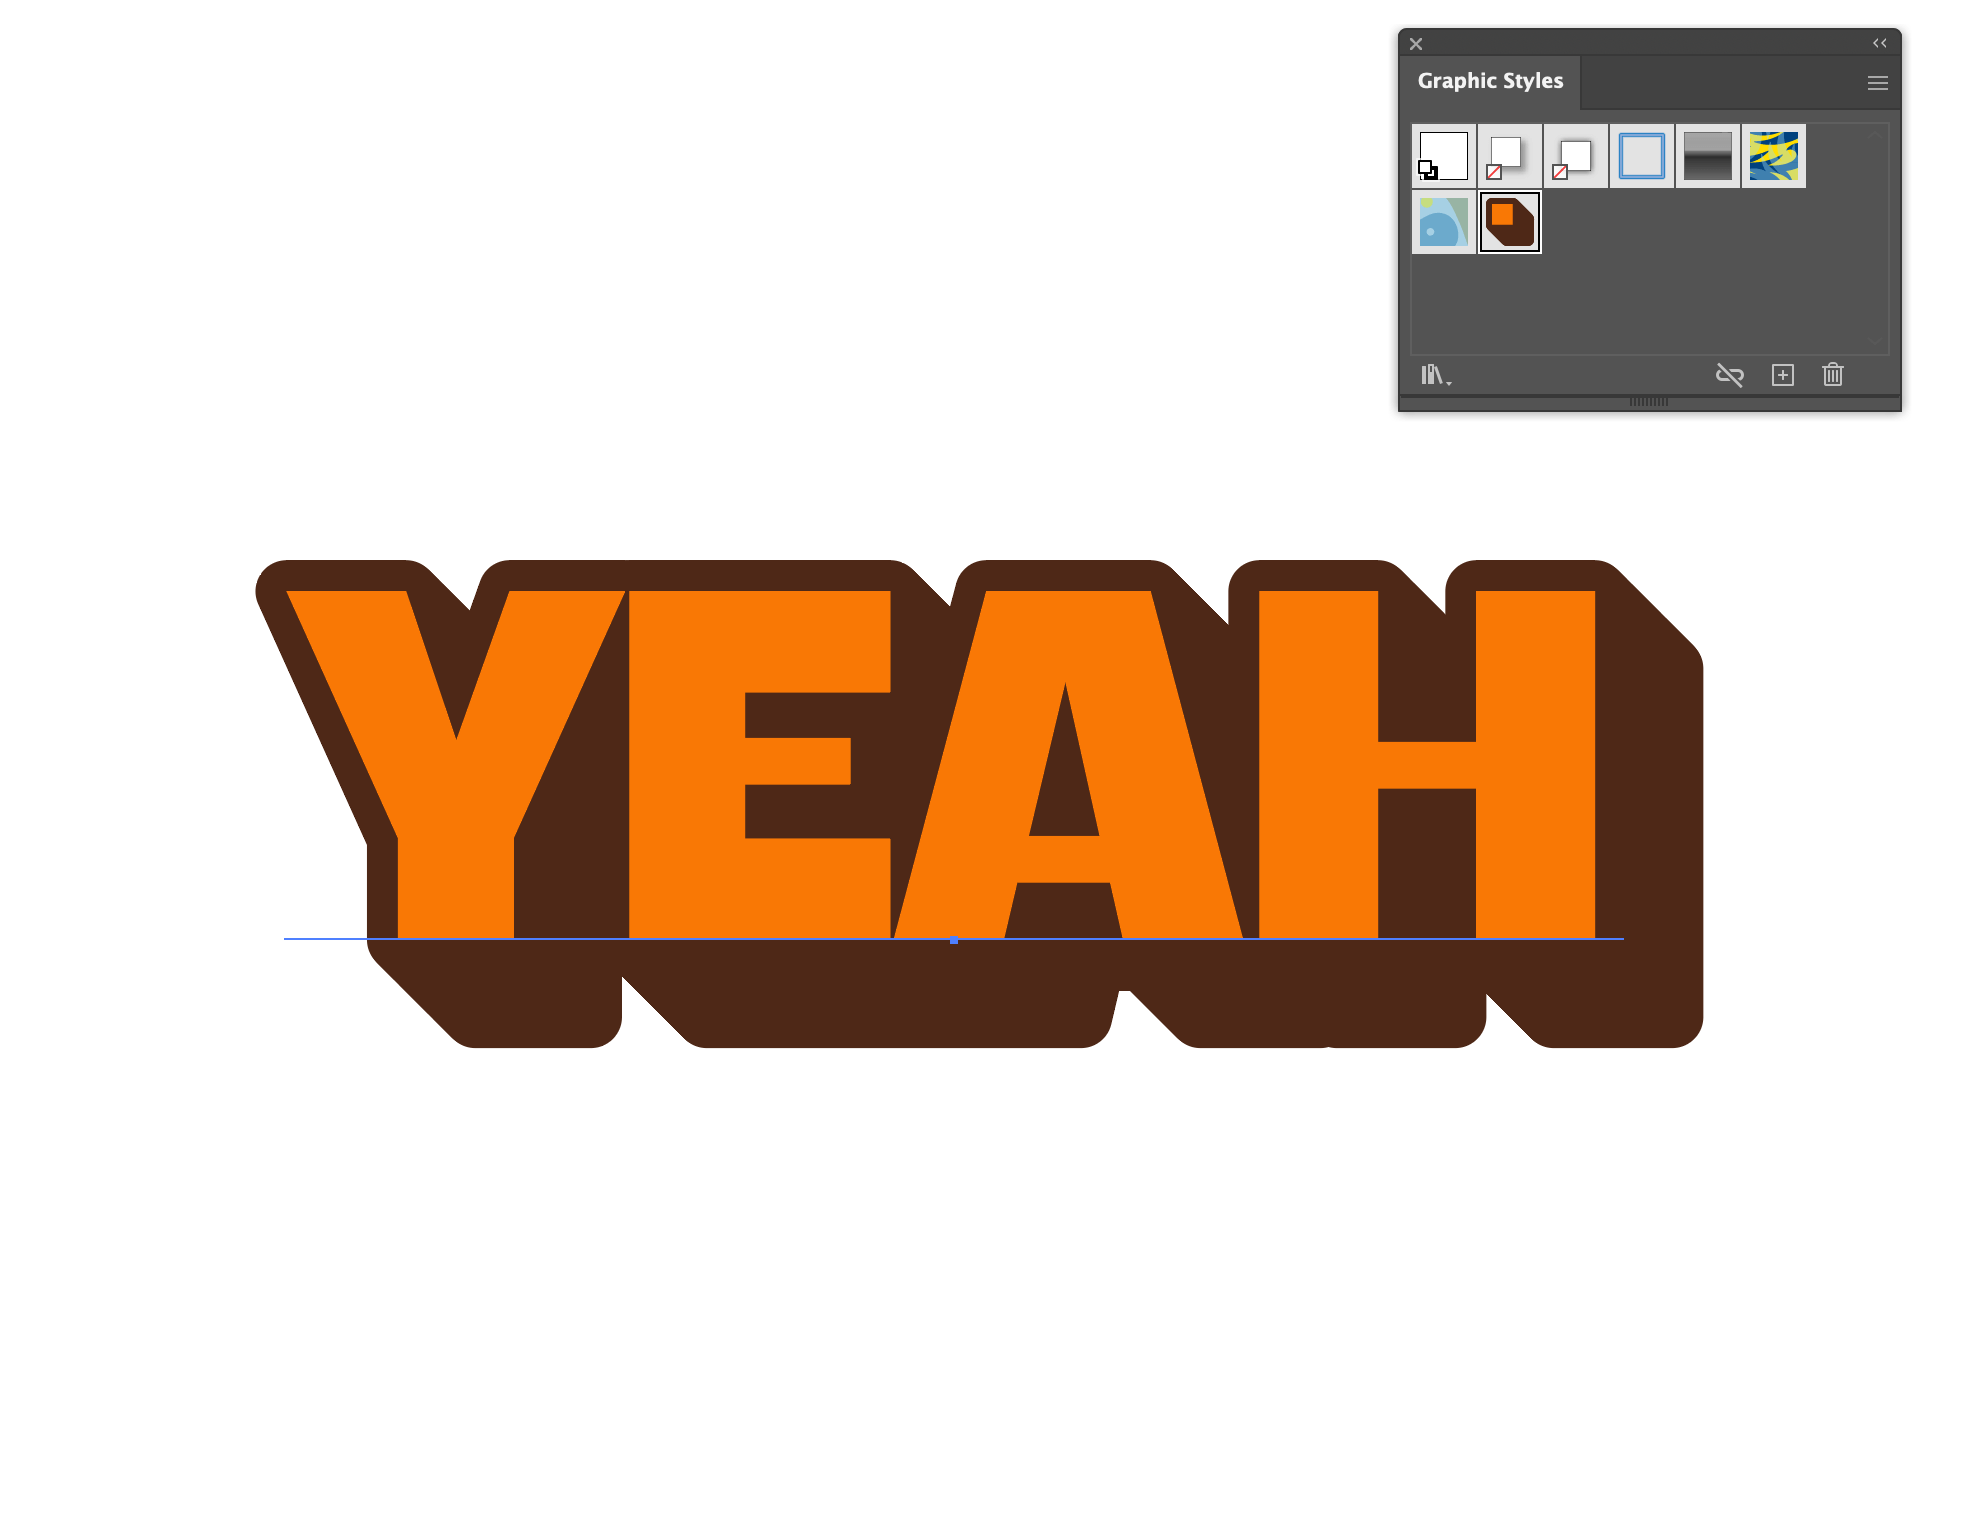
Go to Window > Graphic Styles and drag your text into this panel. Now it's part of this document each time you open it. If you want to have this text effect saved for other documents as well, go to the library icon at the bottom left corner and select Save Graphic Styles. Make sure to remove any graphic styles in there that you don't want to save.
Well, that’s all! This way your text is fully editable and you don't need to create this effect ever again. Changing the colors, the depth of the shadows, and any other edits can be done through the Appearance panel after selecting the text.
And as promised, whenever you want to change the text, it's kept intact so it will be ready to get swapped for another piece of text anytime you want.
The same Offset Path feature can be used to create a sticker cut line as well, which is an important part of creating die cut stickers, and using this method will keep you from doing this manually.
Want to slap this design onto a sticker? Our custom die cut stickers would be a perfect fit. With thick, durable vinyl that protects your stickers from scratches, water & sunlight.
Comments